

Note:My fan conversion does not change the cosmetics of the bike nor necessitate any grinding off of the cam shaft.
An Electric Fan cooling system is far superior to a mechanical fan because
1:Less load on the engine.
2:Only used when required.
3:Less chance of Fan Explosion.
4:Easier to remove for servicing.
and will...
Increase performance and or reduce fuel consumption and speed up engine start-up operating temperature.
The system below and the under extreme conditions such as in the garage testing the fan kicks in around the middle of the temp gauge and then takes a couple of minutes to drive the temp down below the nominal mark and the fan to switch off.Under normal road conditions and not stopped in traffic for long the fan is hardly if ever used depending on the ambient temperatures of the day because the normal air cooling .
The wiring circuit is very simple.
I made a connector block with 3 connectors and wired it so two were connected across.
This is because at some point I'm going to fit some home-made heated grips like on my other CX so I wanted two 12v+ supplies near the front of the bike
http://www.geocities.com/sheppola/grips/grip1.html

and then mounted it here but ignore the black wire as that's not connected to the block it's the ground/frame wire back from the temp sensor.The brown wire is the 12v+ from the rear brake wire near the air filter top that I spliced into with a connector block.This means the Efan is switched off when the ignition is off and also part of the lighting fuse circuit.

.Then you put a wire into the other side of the block to the positive side of the Fan(On this fan that means it SUCKS air through the Radiator which is what we want.If you mount a fan on the front of the Radiator you will need to reverse the polarity so it blows Through the radiator.
The other side of the Rad Fan wire goes to the Thermo Temp switch and then to the frame to ground the circuit and is the black wire you see secured to the frame at the Coil bolt.

I looked into this some time ago and had a partial success but wasn't happy with the Temp Switch arrangement/opening times
e.g the Electric Fan switching on too late.It was a while after I removed my attempt that I found out the temp switch I had got was not the one I wanted.It was a 90 Deg C N/O(Normally open) and I wanted a 70 Deg C N/O(Normally open) so I ended up putting the Mech fan back on a forgot about it until recently.
Anyway with the correct one fitted I've gone back to the project and so far testing has gone well.
The 2nd hand fan is Ducati 748/916/996 radiator FAN single fan type.These kind be found at various prices on Ebay just type Ducati Fan into Ebay.These have the correct CFM and dimensions to do the job and only draw 2 amps when in use.
When fitted to the bike the cam shaft would have needed grinding off as it was hitting a spot on the Electric fan body.
I didn't want to do this so what I did was make a new hole and brazed a nut to it on the bottom right hand side of the Radiator bracket.
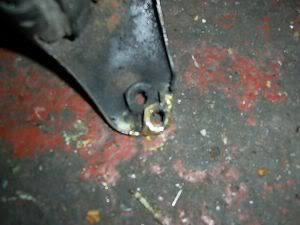
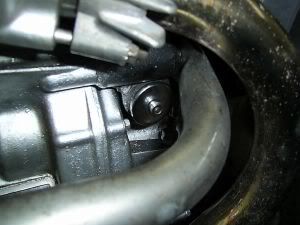
This allows the Radiator to just be a little more forward and let the Cam shaft not touch the Electric Fan body.
Not easy to see but in the box in this picture,

Recap/Procedures:
1:Small bracket to attach fan to offset side was made from some metal carpet strip drilled and bent at 90 Deg one end and bolted into hole drilled into Rad cowling.Other side was Fan tab bent and drilled and bolted.
2:Thermo Switch.Bare area at top of rad.Super glue Mating face to Rad and then Epoxy twin(Araldite) to bond secure around edges NOT on mating face.
3:Standard car spade connectors and in-line bullet connectors used for ease of removal(Auto type shops dead cheap).
Thermo Type used
70DEG.C NORM OPEN THERM SWITCH (RC)
http://www.rapidonline.com/Electronic-Components/Sensors/Thermal-Sensors/Auto-reset-thermal-switches/35569/kw/26-7414?source=googleps&utm_source=googleps
These types of Thermo Switches come in two types N/C(Normally Closed) and N/O(Normally Open).We want the N/O type so they close when they hit the preset temperature in this case around 70 Deg C.
Now normally most engines temp switches/sensors use 85 Deg C but because of the Switch being mounted at the top of the RAD and not into the coolant I allowed for the slightly lower temperature it would detect.This has worked well

Note:You have to remove the original CX/GL Fan guard but as I never liked it anyway it's no biggy
I have yet to do any fuel mileage checks but the bike is definitely,"Nippier" e.g seems faster on acceleration
